


The Best Way to Grill a Wagyu Top Sirloin
Get a reliable way to grill Wagyu top sirloin, from seasoning and heat setup to doneness, resting, slicing, and choosing a steak for your cookout.
Get a reliable way to grill Wagyu top sirloin, from seasoning and heat setup to doneness, resting, slicing, and choosing a steak for your cookout.

Grill Wagyu top sirloin over high heat for a browned exterior, then move it to a cooler part of the grill if it needs more time. Use a thermometer instead of guessing, rest the steak before slicing, and cut across the grain. The goal is a strong sear without leaving the center to chance. Choose your Wagyu cut and get ready to grill.
Contact Slickhorn Ranch to get help choosing a cut.
Wagyu top sirloin works well on the grill because it can take a direct sear while still benefiting from careful temperature control. Its rich flavor needs little more than salt and pepper, and its steak shape is easy to turn and monitor. Keep the process simple: dry the surface, season, sear, check the center, and rest.
Top sirloin is a practical choice when you want a substantial steak with a beef-forward taste and a satisfying browned crust. It is not the same cut as ribeye, so do not expect identical texture or fat distribution. Compare cuts in the Wagyu steak selection before you plan your cook, and browse the broader Wagyu collection if you are still deciding what to serve.
Wagyu refers to a type of beef, not a promise that every steak cooks exactly alike. Thickness, starting temperature, grill heat, and the individual cut all affect timing. Treat a time estimate as a prompt to check, not as proof that the steak is done. A thermometer gives you a more dependable read than appearance alone.
Start with a dry surface, a clean grill, and a simple seasoning. Pat the steak dry, season both sides, and let the grill preheat fully before the meat goes on. Set up a hot zone and a cooler zone so you can sear first and finish gently if needed.
Take the steak out of its packaging and pat it dry with paper towels. Moisture on the exterior has to evaporate before browning can begin. Season shortly before grilling with salt and black pepper. If you want a little more flavor, use a restrained amount of garlic or paprika so the beef remains the focus.
Keep the preparation uncomplicated. A heavy sugary glaze can scorch over a hot flame, and a thick coating of seasoning can obscure the steak’s own flavor. For another seasoning idea, the American Wagyu Association shares a grilled Wagyu top sirloin recipe with a Southwestern-style rub and salad. Use it as inspiration, then adjust the seasoning to suit your meal.
Give yourself a few minutes to organize the cooking area before the steak hits the grate. Put the thermometer where you can reach it, keep a clean landing plate separate from anything that held raw meat, and have your serving knife ready. This small setup prevents a rushed search for tools while one side is already browning. If you are serving sides, start anything that needs a longer cook first so the steak can rest without holding up dinner.
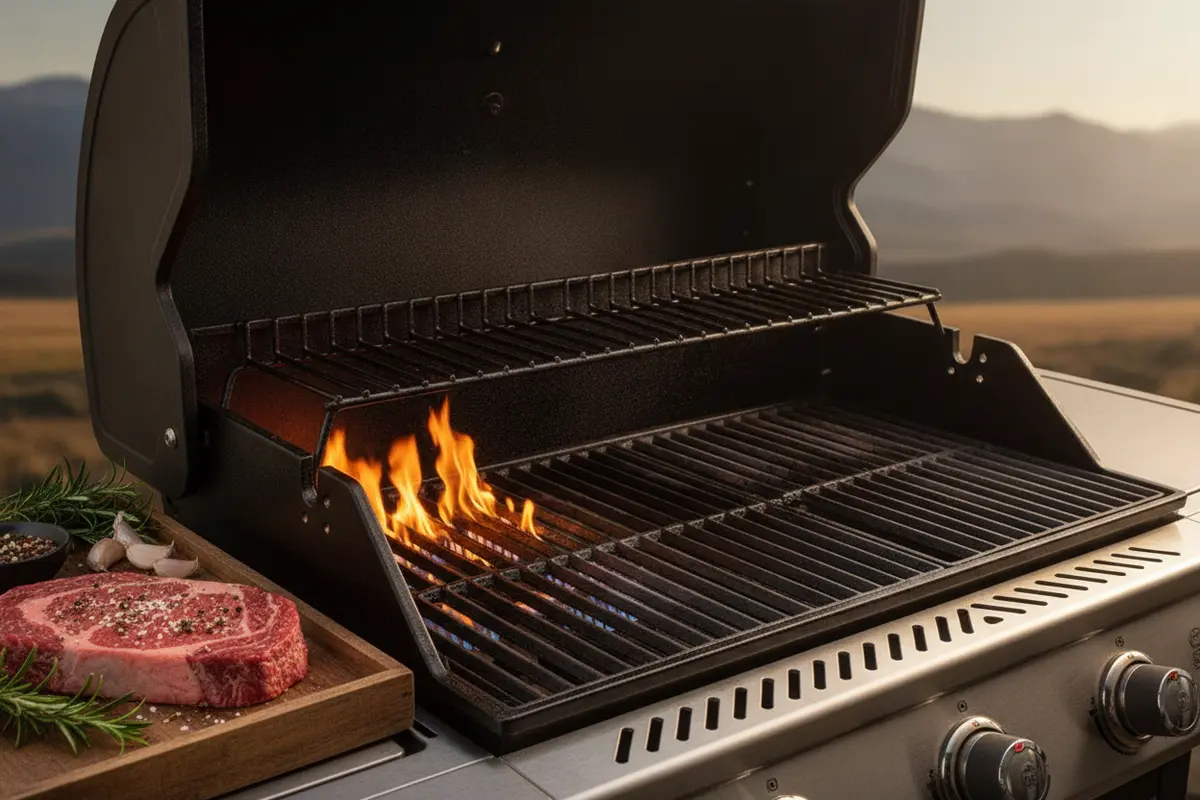
Grill the steak over direct heat long enough to build a browned crust, turning it as needed, then use the cooler zone to finish the center without over-charring the outside. Check the thickest part with a thermometer, remove the steak when it reaches your chosen endpoint, and rest it before slicing.
Exact grilling time varies with steak thickness, grill type, wind, and how hot the grate actually is. Start checking early rather than relying on a fixed minute count. If you cook outdoors in the Northern Rockies, changing wind and cool air can affect how quickly a grill recovers after the lid opens. Keep the lid closed between checks and allow extra time for the grill to return to temperature.
On a gas grill, the burner controls make it straightforward to keep one side hot and another side cooler. On charcoal, bank the coals to one side before cooking, leaving an area without coals for gentler finishing. Either setup gives you a place to move the steak if the flame gets aggressive. A quick check of the grate before cooking also helps: if it is not fully hot, the steak may stick or brown unevenly while you wait for the surface to catch up.
Use the steak itself as your guide as you work through the steps. If it releases easily and has a browned surface, turn it; if it clings, give it a little more time rather than tugging. The instant-read check should be deliberate but brief. Close the lid again after taking a reading so the grill holds heat, and avoid leaving the probe in a place where it touches the grate.
Use direct heat to sear the outside and indirect heat to finish a thicker steak more gradually. A thinner steak may cook through during the sear, while a thicker one can benefit from a two-zone setup. The best method depends on thickness and how quickly the exterior is browning.
| Grill approach | Best fit | How to use it | What to watch |
|---|---|---|---|
| Direct heat only | Thinner steaks or cooks who can monitor closely | Sear both sides over the hot zone, checking the center promptly | The outside can overbrown before a thick center is ready |
| Direct then indirect | Thicker steaks or a strong sear with a gentler finish | Brown both sides over direct heat, then move to the cooler zone | Keep the thermometer in play; the center continues to warm |
| Indirect then sear | A thicker steak when you want to bring the center up gradually | Cook away from the flame first, then finish with a brief hot sear | Watch the final sear closely so the exterior does not go too far |
Think of the two zones as a control system, not as a rigid recipe. If the steak is already close to your preferred doneness after the first sear, there is no need to keep cooking it on the cooler side. If the outside is getting dark too quickly, move it away from the flame and let the center catch up.
Choose your sequence by comparing the steak's thickness with the pace of browning. For a thin steak that is coloring quickly, direct heat may do the whole job, provided you check the center early. For a thicker steak, searing first builds the crust, then indirect heat offers a calmer finish. Starting indirectly and searing last is another option when you want to bring a thicker center along gradually, but the final sear needs close attention. There is no single sequence that fits every grill and every steak; use the thermometer and the surface color together.
A thermometer is the clearest way to judge doneness because color and firmness can mislead you. Check the thickest part without letting the probe touch the grill, and remember that temperature can rise slightly while the steak rests. Choose a doneness that suits your preference and follow food-safety guidance.
Insert the thermometer horizontally from the side when the steak is thin, or from the top when there is enough depth to reach the center. Take the reading in the thickest section. If one part is thinner than another, check both areas and move the steak off heat when the thicker center reaches your intended endpoint.
Do not cut repeatedly into the middle to inspect color. Each cut lets juices escape, and lighting can make cooked meat look different from one setting to another. If you are cooking for guests with different preferences, you can remove a portion earlier and leave another on the cooler side longer. Keep the serving portions separate and use a clean platter for cooked steak.
For a more useful reading, pause the cooking long enough to place the probe in the center of the thickest section, then pull it back slightly if the number seems inconsistent. With an uneven steak, check a second spot rather than assuming the thinnest end represents the whole piece. Plan for a small amount of carryover warmth during the rest, but do not rely on it to correct an undercooked or overcooked center. If you are unsure about a thermometer reading, take another reading before serving instead of cutting the steak open repeatedly.
Rest the steak on a clean board before cutting so the surface settles and the juices are less likely to run straight onto the plate. Then identify the direction of the muscle fibers and slice across them. Thin, cross-grain slices are easier to chew than thick cuts running with the grain.
Move the steak off the grill and let it rest for several minutes. Do not wrap it tightly; trapped steam can soften the browned exterior. While it rests, finish side dishes or warm serving plates. Look for the long lines in the meat, turn the steak so your knife crosses those lines, and make even slices with a sharp knife.
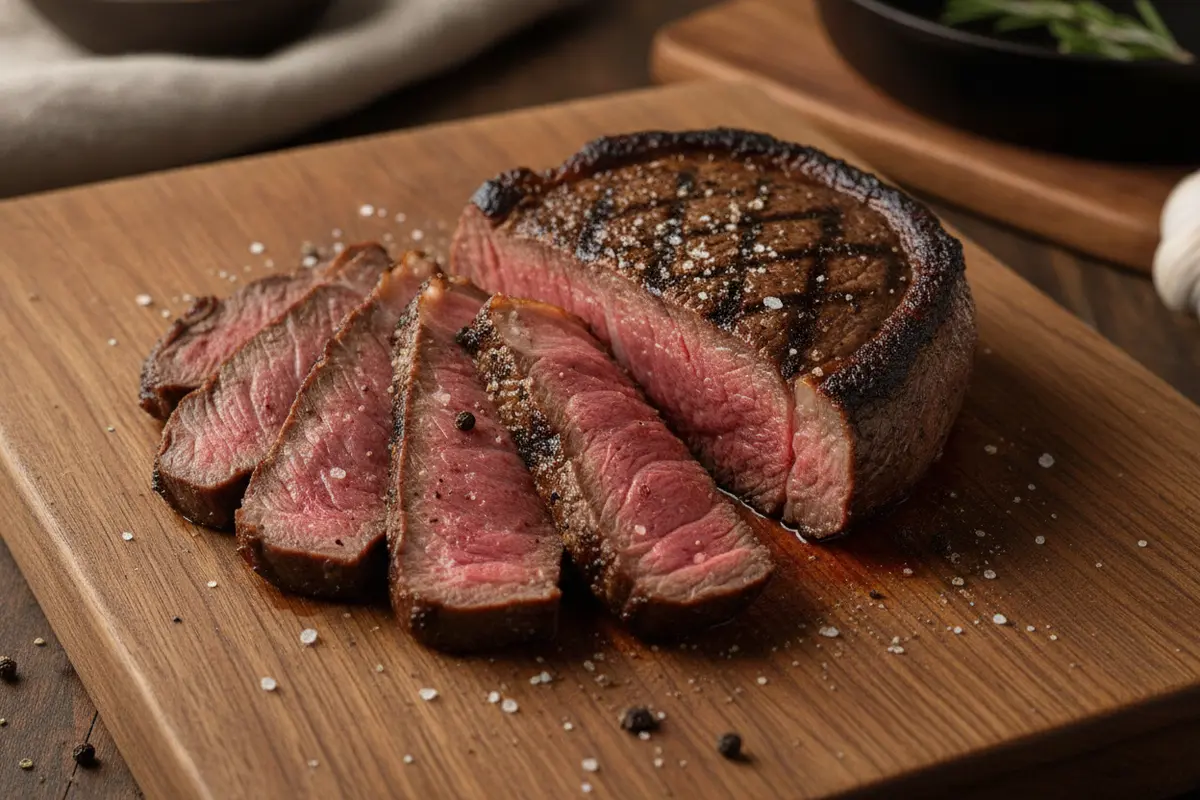
Serve the slices as the main event, or place them on a platter for a shared dinner. For a larger spread, compare a steak with a ready-to-share Wagyu sampler box or explore the beef box selection when you want several cuts for a gathering. Keep the steak simple and add sauces or sides separately so each person can choose how much to use.
To slice cleanly, steady the steak with a fork or tongs and use a smooth, confident knife stroke rather than pressing down hard. If you are serving the steak whole at the table, you can still cut a few slices first to show the direction of the grain and make serving easier. Arrange the slices loosely instead of stacking them tightly, which can trap steam against the crust. Serve promptly after slicing while the surface is still warm.
The most common problems are cooking by the clock, using a damp steak, letting flames scorch the surface, and slicing with the grain. Fix those issues with a dry steak, managed grill zones, temperature checks, and a brief rest. Small adjustments give you more control than adding extra seasoning or sauce.
If you prefer a softer, less smoky cooking environment, searing in a hot skillet is another option. A Wagyu ribeye or Wagyu filet offers a different cut and eating experience, but each requires the same attention to thickness and doneness. For a different flavor direction, a Wagyu flank steak is another cut to consider; slice it across the grain after cooking.
When a cook goes off track, identify the issue before changing several things at once. If the crust is too dark while the center is still behind, move the steak to the cooler zone and close the lid. If the steak sticks, wait for the surface to release rather than pulling it away. If the finished slices seem chewy, check whether you cut across the grain and whether the steak was cooked beyond your preference. These adjustments make the next cook easier to control.
Choose based on the meal and the way you plan to cook, not on a single label. Top sirloin suits a straightforward grill session; a steak with a different shape or thickness may call for a different heat strategy. Review the cut details, portion plan, and available options before you set the menu.
If you are shopping for one steak to grill, start with the Wagyu steak selection and check the current product descriptions. If you are choosing for several people, compare cuts in the Wagyu collection and consider whether you want individual steaks or a box. For a broader dinner plan that includes another beef category, the USDA Prime and Choice collection is a separate place to review available products.
Do not assume every cut is aged in the same way. Slickhorn Ranch's 28-day dry-aging applies only to Prime and Choice cattle, not all beef. If dry-aged beef is what you want, use the dry-aged beef selection to check current options. If you are deciding among different cooking styles or cuts, check the product descriptions rather than relying on a general label.
Hosting a larger group? A Wagyu Signature Box or the wider box-set collection can help you compare assortments. For ground-beef dishes alongside steaks, see the Wagyu ground beef listing. Availability and details belong to the current product pages, so check them while planning your menu.
Match the cut to the job you want it to do. A steak dinner can center on one cut grilled and sliced for sharing, while a cookout with several guests may call for a mix of steaks, a box assortment, or an additional ground-beef dish. If you are buying ahead, review the current product details and plan storage and thawing time around your meal. Keep the cooking method in mind as you compare: a thick steak can work well with two-zone heat, while a thinner cut rewards close attention and a quicker finish.
Compare Wagyu cuts for your grill.
Good grilling comes down to heat control, a thermometer, and a little patience. Use the answers below to adjust your method to the steak in front of you, rather than treating one timing estimate as universal. Then serve it sliced across the grain.
No. Salt and pepper are enough for a simple grilled steak. If you want a marinade or rub, keep it balanced and avoid a sugary coating over very high heat, where it can scorch.
You do not need to leave steak sitting out for an extended period. Take it from the refrigerator when you are ready to prepare the grill, dry the surface, season it, and cook with a thermometer. Avoid leaving raw meat at room temperature for long stretches.
Yes. Either grill can work. Preheat it well, create a hot area for searing, and keep a cooler area available so you can manage flare-ups or finish the center more gently.
Do not cook it past your preferred doneness, and check the center with a thermometer instead of repeatedly cutting into the steak. Move it away from intense flame if the exterior browns quickly, rest it before slicing, and cut across the grain.
Simple sides work well: grilled vegetables, a crisp salad, potatoes, or warm bread. Set sauces and strongly flavored condiments out separately so they do not cover the steak's flavor.
Keep the cook simple: dry the steak, season it, sear over a hot grill, and use a thermometer to guide the finish. A short rest and a cross-grain slice complete the job. Choose the cut that fits your menu, then make the grill earn its keep.
Shop Wagyu and pick your next steak.
From a weeknight meal to a dinner worth gathering around, a steady fire and a well-handled steak make a strong combination.
Your cart is currently empty.
Start Shopping