


How to Cook Dry-Aged Prime Beef at Home
Get a better sear and juicy center with practical steps for seasoning, pan-searing, grilling, and resting dry-aged Prime beef at home.
Get a better sear and juicy center with practical steps for seasoning, pan-searing, grilling, and resting dry-aged Prime beef at home.

How to cook dry aged prime beef comes down to a few deliberate moves: dry the surface, season simply, build a hard sear, and use temperature—not guesswork—to finish the steak. Dry-aged beef brings a concentrated, savory character, so the best approach lets the meat lead. Contact Slickhorn Ranch to plan your next steak dinner.
Ask us about choosing beef for your table.
Dry-aged Prime beef is still cooked like a steak, but its surface and flavor call for a little care. Pat it very dry, season without burying the beef, and watch the crust closely so the concentrated flavor stays balanced.
Dry aging is a controlled process that reduces moisture at the surface and develops flavor over time. Slickhorn Ranch's 28-day dry aging applies only to Prime and Choice cattle; it does not describe every beef item the ranch offers. For a general explanation of the process, the Beef Research article on dry aging discusses the method and its effects.
At home, you do not need a complicated marinade or elaborate rub to make a dry-aged steak taste special. Salt and pepper are usually enough to frame the beef. A neutral high-heat cooking oil, a heavy skillet or clean grill, and an instant-read thermometer give you more control than a long ingredient list.
Start with the cut you have. A thick steak such as a dry-aged Denver steak can take a strong sear and a gentle finish. A tender center-cut option such as filet mignon benefits from careful temperature checks because a leaner shape can move from underdone to overdone quickly. The precise timing depends on thickness, starting temperature, cooking surface, and heat.
Prepare the steak by removing excess surface moisture, seasoning it evenly, and getting your tools ready before the meat hits the heat. These small steps make browning easier and keep you from scrambling while the steak cooks.
Keep the seasonings and finishing touches close at hand: salt, pepper, oil, tongs, thermometer, and a knob of butter or herbs if you plan to use them. This is a straightforward kitchen checklist, not a reason to fuss over the steak. The Slickhorn Ranch FAQ can help with product and order questions, while the recipe collection offers ideas for rounding out the plate.
Choose the method that suits the steak's thickness, your equipment, and the meal you want to serve. A skillet gives close control over the crust, a grill adds fire-kissed flavor, and a reverse-sear gives a thick steak a gradual path to its final temperature.
| Method | Best fit | What to do | Watch for |
|---|---|---|---|
| Skillet sear | Most steaks, especially when you want a deep crust | Heat a heavy pan, sear both sides, then lower the heat or finish in the oven if needed | Pan smoke and a crust that darkens before the center is ready |
| Grill | Steaks cooked outdoors or meals built around live-fire flavor | Preheat clean grates; sear over direct heat and move to a cooler area to finish | Flare-ups and uneven hot spots |
| Reverse-sear | Thicker steaks that need a more gradual interior cook | Warm the steak gently in a low oven, then sear briefly in a very hot pan | Skipping the thermometer or leaving the final sear too long |
For an uncomplicated first attempt, use a skillet. If you already know your grill's hot and cool zones, grilling is a fine choice too. Reverse-searing is especially useful when a steak is thick enough that a quick sear alone would leave a large gap between the crust and the desired center. Regardless of method, adjust to the actual steak rather than relying on a fixed cook time.
Before cooking, compare the options available in Slickhorn Ranch's USDA Prime and Choice collection. For a meal with a few different cuts, browse the beef boxes and check the individual product details so you know what is included.
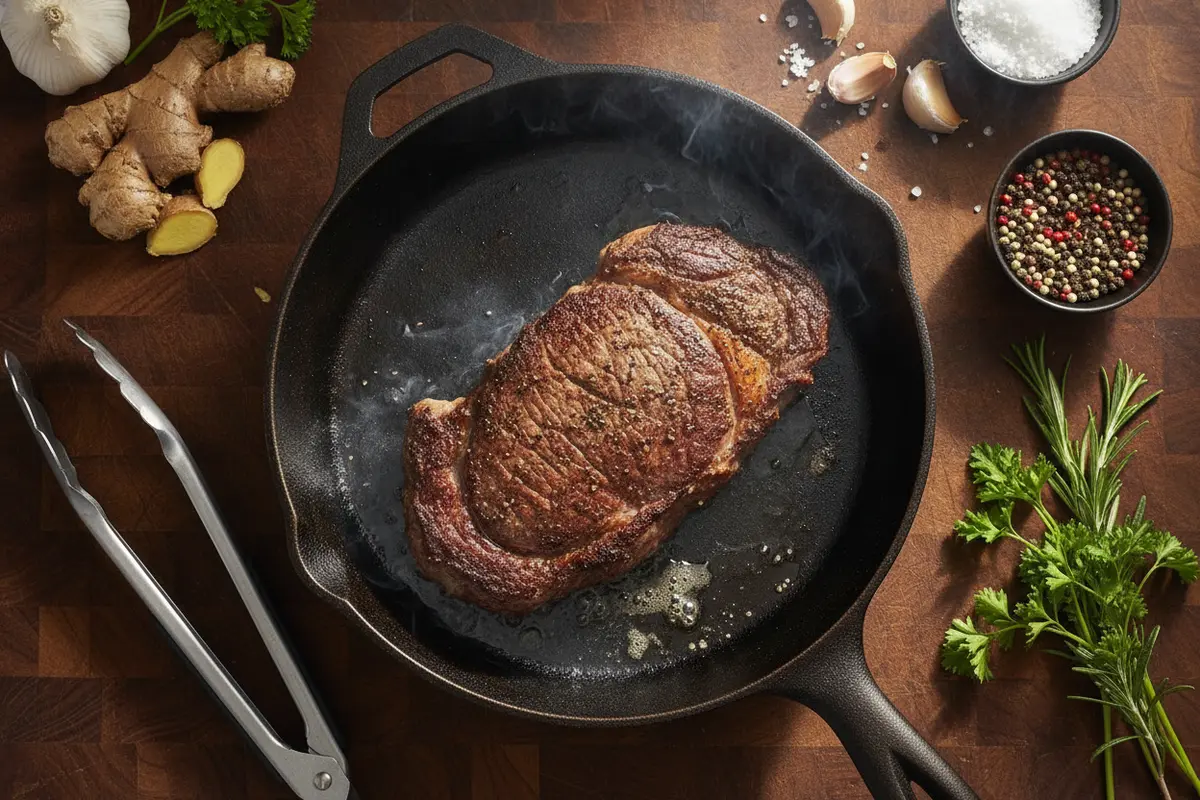
To pan-sear, preheat a heavy skillet, add a thin film of high-heat oil, and lay the dry steak down away from you. Sear without moving it until a rich brown crust forms, turn once, and use lower heat or the oven to bring the center to your preferred doneness.
Set a ventilation fan on before heating the pan. When the skillet is hot, add just enough oil to coat the cooking surface. If the oil smokes heavily, lower the heat briefly; the goal is a vigorous sear, not scorched oil. Place the steak carefully in the pan, leaving space around it if you are cooking more than one.
Let the first side make steady contact. Repeatedly lifting or sliding the steak interrupts browning. When the underside has formed a deep brown crust, turn it with tongs. Sear the second side, then check the center. If the exterior is where you want it but the middle needs more time, reduce the heat or move the skillet to a moderate oven. That finish is gentler than continuing to blast the outside.
For a thicker steak, baste only near the end if you want to add butter, garlic, or herbs. Tilt the pan carefully and spoon the foaming butter over the steak for a short time. Butter is optional; it can brown quickly, so keep the heat in check. Finish with a small pinch of salt if needed, then move the meat to your prepared plate.
One common mistake is crowding the skillet. Several cold steaks can cool the pan and trap steam, which makes a good crust harder to achieve. Cook in batches if needed. Another is pressing down with the spatula; that does not speed the center's cooking and can squeeze juices onto the pan.
On a grill, sear over direct heat and finish over a cooler zone; for reverse-searing, warm the steak gently before giving it a fast final crust. Both approaches separate browning from interior cooking, which gives you useful control over a thick cut.
For grilling, preheat the grill and clean the grates. Create a hotter area for searing and a cooler area for finishing. Sear the steak over the hot zone, turning as needed to brown the surface without letting flames engulf it. If fat drips and causes a flare-up, move the steak to the cooler side until the flare settles. Then finish with the lid closed if your grill design allows and check the thickest part with a thermometer.
For the reverse-sear, place the steak on a rack set over a tray in a low oven. Warm it gradually, checking its temperature as it approaches your desired finish. Once it is close, preheat a skillet until very hot, pat the surface dry again if needed, and sear briefly on each side. Since the center is already warm, the final sear is for color and crust rather than a long cook.
Reverse-searing can be a strong choice for a thick dry-aged beef selection, but the product and cut should guide your plan. A thin steak may not need the extra oven step. Check thickness, shape, and any package guidance before choosing a method.
Use an instant-read thermometer in the thickest part of the steak, and remove it from the heat a little before the final temperature you want because the center can continue to warm as it rests. Then let it rest before slicing so the juices are less likely to run across the board.
There is no universal minute-by-minute schedule for steak. A narrow filet and a broad Denver steak heat differently, as do a cold steak and one that has been out briefly during prep. Begin checking early, especially with thinner pieces. Insert the thermometer from the side so the tip reaches the center; check again if the reading seems inconsistent.
Account for carryover cooking. The temperature may climb after the steak leaves the pan or grill, with the amount depending on its size and how intensely it was cooked. If you prefer a particular doneness, use a reliable thermometer and the appropriate food-safety guidance for your kitchen. Do not rely on color alone: lighting, the cut, and the location of the slice can all affect how the interior looks.
Let the steak rest on a warm plate or board for several minutes before cutting. A very thick steak may need a longer rest than a thin one. Avoid sealing it tightly in foil, which can soften the crust with trapped steam. Slice across the muscle fibers when the cut makes their direction visible. A sharp knife and a clean board make serving easier.
For a multi-cut spread, a dry-aged sampler box can provide a few options to plan around, subject to the listed contents and availability. Another choice is a dry-aged flank steak, which should be sliced thinly across the grain after cooking.
Keep the sides balanced and let the steak stay at the center of the meal. Crisp vegetables, potatoes, a bright salad, or a simple pan sauce can complement a rich beef flavor without turning dinner into a project.
For a classic plate, pair the steak with roasted potatoes and a green vegetable. A sharp vinaigrette or lightly dressed salad can add freshness next to a deeply browned crust. If you make a pan sauce, build it after removing the steak: pour off excess fat, add a small amount of liquid to loosen the browned bits, and finish with butter or herbs if desired.
If you are hosting, prepare sides before the steak goes on the heat. That leaves you free to watch the surface, check the temperature, and rest the meat without juggling several last-minute tasks. Bring the steak to the table whole or slice it just before serving, and season the slices lightly only after tasting.
For a special-occasion menu, explore the available steak cuts alongside the dry-aged options. Slickhorn Ranch also has a dry-aged chuck roast for a slower, shared meal, though a roast calls for a different cooking plan than the steak methods above.
Choose a Prime or Choice cut for your next dinner.
Dry-aged Prime beef needs no elaborate technique: keep its surface dry, brown it well, and check its temperature as it cooks. These answers cover seasoning, cooking oil, timing, and the difference between the ranch's dry-aged and Wagyu offerings.
Usually, no. A simple seasoning of salt and pepper lets the beef's own flavor come through, and a wet marinade can make surface browning harder. If you use a marinade, blot the steak dry before it goes into a hot pan or onto the grill.
Use a neutral oil that is suitable for high heat, and use only enough to lightly coat the pan. Butter can be added near the end for flavor, but it is not necessary to create a crust and can burn if the skillet is too hot.
Cooking time varies with thickness, starting temperature, pan or grill heat, and preferred doneness. Treat any recipe time as a starting point, not a guarantee. Check the thickest part with an instant-read thermometer and make adjustments as you go.
No. The 28-day dry-aging description applies only to Prime and Choice cattle. Slickhorn Ranch also offers Fullblood Wagyu and other beef products; check each product page for details rather than assuming one process applies to every cut.
Many steak techniques, including searing and temperature checking, apply to both, but the cut and marbling influence how you manage heat and portions. Check the product description and adjust the method to the specific steak. Explore the Fullblood Wagyu collection if you are planning a separate Wagyu dinner.
A good steak dinner starts with choosing a cut that suits your table and having a simple cooking plan ready. Keep the tools close, pay attention to the sear, and let the thermometer do its job.
Get in touch with Slickhorn Ranch to plan your order.
With a little preparation and a steady hand at the stove or grill, dry-aged Prime beef can make a memorable meal without a complicated recipe.
Your cart is currently empty.
Start Shopping