


How to Cook Thor's Hammer Roast
Get a practical guide to how to cook thor's hammer roast, from braising and smoking to resting, carving, and serving a dramatic bone-in shank at home.
Get a practical guide to how to cook thor's hammer roast, from braising and smoking to resting, carving, and serving a dramatic bone-in shank at home.

A Thor's Hammer roast looks like a medieval trophy, but it cooks like what it is: a bone-in beef shank built for patience. The lower-leg muscle contains plenty of connective tissue, so a quick sear will not turn it tender. Give it steady heat, a little moisture, and enough time for the collagen to soften into a rich, spoon-tender roast. Shop premium beef roasts for your next centerpiece.
Shop premium beef roasts for your next centerpiece.
The most reliable way to learn how to cook thor's hammer roast is to season it, sear it thoroughly. Then cook it covered at a low temperature in a flavorful braising liquid until the meat yields easily. A practical starting point is a 150 C oven for 4 to 6 hours. But the clock is only a guide; texture and temperature control decide when it is ready.
Before you choose a pot, smoker, or slow cooker, it helps to understand the cut's long bone and dense structure. That detail explains why this dramatic roast rewards a braise instead of steak-style timing, and it will guide every preparation choice that follows.
A Thor's Hammer roast is a frenched beef shank from the lower leg, usually left attached to a long bone for a dramatic centerpiece. Because the shank is a hardworking cut, it rewards gentle heat, plenty of moisture, and patience rather than a fast steak sear.
Despite the mythic name, this is not a specialty steak. It is shin beef on the bone, trimmed so the bone stands proud while the meat cooks around it. That long bone gives the roast its unmistakable shape, but the real cooking lesson is in the cut's structure. A shank is built for movement, so it is firm when treated like a quick-cooking steak and far more forgiving when braised until tender. Our beef cuts and cooking methods guide offers useful context for where shank fits among roasts and braises.
That distinction matters when planning how to cook Thor's Hammer roast. A steak method typically aims for a browned exterior and a particular internal temperature in a short window. This roast needs a covered, low-and-slow approach that lets heat and liquid do their work over time. Think Dutch oven, sturdy roasting pan, or another setup that can hold moisture close to the meat, not an uncovered skillet and a quick finish.
Start with the same practical habits you would use for other substantial roasts: season the surface. Give the meat at least 10 minutes at room temperature, and sear it before the longer cook. Then let the roast settle into its braising environment. For a broader foundation, see this guide to cooking a beef roast, or compare the approach with a low-and-slow Wagyu chuck roast. The cuts differ, but both show why time and controlled heat can turn a substantial roast into a table-worthy meal.
The safest approach is a covered, low-and-slow braise that surrounds the shank with moisture and gives tough connective tissue time to soften. Use the clock as a starting benchmark, then judge the roast by how easily a fork or skewer moves through the meat.
This sequence adapts the method documented in a Thor's Hammer braised shin recipe. A heavy Dutch oven, a tight lid, and enough cooking liquid will do more for the final texture than chasing an exact finish time.
Cut across the grain and serve with the jus. A knife should pass through cleanly, while the meat remains moist rather than shredding into dry strands.
A good braising liquid surrounds the roast with savory aromatics, enough stock to create steady moisture, and a tomato element for depth and balance. Keep it below the top of the meat, then adjust the strained juices after cooking so they become a clean jus rather than a thin, watered-down sauce.
Start by building flavor in the same heavy pot you used for searing. Add roughly chopped onion, carrot, and crushed garlic, letting the vegetables pick up the browned fond from the bottom. Those aromatics do more than perfume the pot: they give the finished jus sweetness, body, and the earthy character that suits a long braise.
Stir in tomato paste and cook it briefly until it darkens slightly. A tomato element brings acidity and savory depth, but it should support the beef rather than turn the liquid into a pasta sauce. A published Thor's Hammer recipe uses tomato paste alongside onions, carrots, garlic, and stock, which is a useful starting framework without requiring a rigid formula. Review the ingredient reference for that combination.
Add stock and scrape up any browned bits. Beef stock is the most direct choice, while a mild vegetable or chicken stock can work when you want the beef and aromatics to lead. Pour in enough liquid to come partway up the roast, generally around one-third to one-half of its height. The meat should braise in a moist environment, not be submerged like a boiled joint.
Season conservatively at the beginning, especially if the stock is salted. Taste the liquid as it reduces and correct it near the end. When the roast is tender, transfer it to rest, strain the pot liquid, and skim excess fat. Reduce the strained jus if it tastes diluted, or loosen it with a splash of stock if it has become too concentrated. For more low-and-slow technique, compare this method with our Wagyu chuck roast guide and broader roast beef cooking guide.
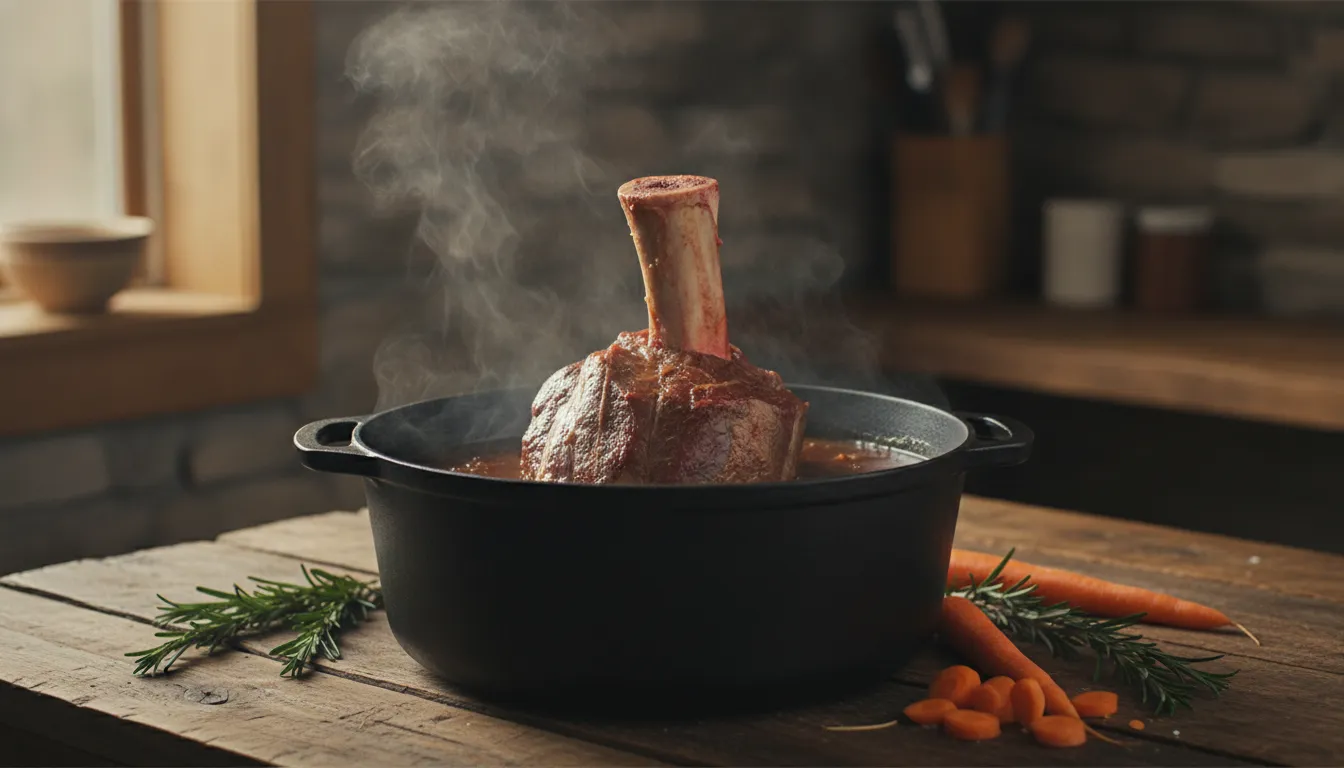
Thor's Hammer needs enough low, steady heat and moisture for the shank's connective tissue to soften, so tenderness matters more than chasing a single clock time. Use a thermometer for food safety, then use texture cues to decide when the roast is ready to serve.
Season the beef generously with salt and pepper before cooking, as one braised-shank method recommends. The cut comes from the lower leg and is commonly left on a long bone. So it behaves differently from a tender roast: a safe internal temperature does not automatically mean the collagen has relaxed.
| Method. | Heat approach. | Starting time range. | Moisture strategy. | Tenderness cue. |
|---|---|---|---|---|
| Covered oven braise. | Moderate oven heat in a covered vessel. | About 4 to 6 hours at 150 C. | Liquid, a tight lid, and occasional basting. | A fork or skewer meets little resistance; meat begins yielding from the bone. |
| Smoker. | Indirect, lower heat. | Longer than an oven braise; begin checking early. | Wrap or add a covered finishing stage if the surface dries. | Probe tenderness matters more than a fixed internal number. |
| Slow cooker. | Low, enclosed heat. | Plan for a long cook and check near the end. | Use enough braising liquid to keep the covered environment humid. | The meat should separate easily without becoming stringy or dry. |
The oven benchmark above is a starting point, not a guarantee. During cooking, rotate and baste the roast occasionally with its jus to support even cooking and a moist exterior. For additional low-and-slow context, compare this method with our low-and-slow Wagyu chuck roast guide and broader guide to cooking a beef roast.
Keep safety and texture in separate lanes. Check the current USDA FSIS beef temperature guidance for safe minimum internal temperatures, but do not treat that minimum as proof of fork-tender shank. When the thermometer says safe and the probe still meets firm resistance, keep cooking gently until the texture tells you the connective tissue has given way.
Yes, Thor's Hammer can take a smoker or slow cooker, but both methods need steady, gentle heat and enough moisture to soften the shank's connective tissue. Smoking adds wood-fired flavor, while a slow cooker is the practical choice when you want a mostly hands-off braise.
Use the smoker when the flavor matters as much as the centerpiece presentation. A useful starting benchmark is 120-135 C for 6-8 hours or longer. Depending on the roast's size, the smoker's behavior, and how much connective tissue the particular piece carries. Treat those numbers as a starting range, not a finish line. The roast is ready when a probe slides into the thickest meat with little resistance.
Smoke alone can leave a large shank dry before it becomes tender. Plan a moisture stage: place the roast in a covered pan with stock or another braising liquid once it has picked up the smoke you want. Keep the liquid around the meat rather than submerging the exposed bone, and check the pan occasionally so it does not run dry. For a broader low-and-slow framework, see this roast beef cooking guide.
A slow cooker suits cooks who want dependable moisture and minimal active attention. Brown the roast first if your setup allows, then add enough liquid to create a humid cooking environment without drowning the meat. Cook until tender rather than relying on a fixed clock. Piece size, starting temperature, and appliance strength can shift the timing considerably. If the roast is still tight, keep cooking; shank texture improves when collagen has had time to break down.
The smoker is the better route for pronounced smoke character. The slow cooker is the better route for convenience and a rich, spoonable jus. Either way, judge the result by tenderness, not by the clock alone.
Rest the cooked Thor's Hammer for at least 15 minutes under a loose foil cover so the juices can settle without trapping too much steam. Once rested, separate the meat from the long bone if that makes the roast easier to handle. Then identify the grain and slice across it for more tender bites.
Pull the pan from the oven and resist the urge to carve immediately. A competitor's braising method also recommends covering the roast with foil and resting it for at least 15 minutes. Which gives the hot juices time to redistribute before serving (braised Thor's Hammer method). Keep the cover loose rather than wrapping the roast tightly. You want to protect the surface while allowing excess steam to escape.
The exposed bone makes a dramatic handle, but it is not always the best carving setup. If the meat has softened around the shank, use a sturdy knife to work along the bone and lift it away. Set the bone aside for presentation, or remove it entirely if you are portioning the roast at the counter. The shape can vary, so let the roast's natural seams guide your knife instead of forcing uniform slices.
Look closely at the cut surface before slicing. The grain is the direction in which the muscle fibers run. Position your knife across those fibers, not parallel to them, and make clean slices at a manageable thickness. This shortens the fibers in each bite. For a closer look at the technique, use Slickhorn Ranch's guide to slice beef against the grain. If you are comparing this presentation with another centerpiece, the standing rib roast cooking guide covers a very different roast structure.
Serve a bone-in shank with sides that balance its rich, slow-cooked character: creamy starches, sturdy vegetables, and something bright or acidic. The best plate gives the tender beef room to shine without making the meal feel heavy from edge to edge.
Think of the roast as the centerpiece, then build contrast around it. A spoonful of jus belongs on the plate, but it does not need to drown everything. Choose sides that can catch the cooking juices while adding a different texture or a cleaner finish.
For a Northern Rockies table, roasted root vegetables and greens make natural partners for a long-braised cut. Keep seasoning direct: salt, pepper, herbs, and the concentrated flavor already in the braising liquid are usually enough. If you are planning a broader roast menu, use this guide to cooking a beef roast for additional preparation context, or compare the approach with a low-and-slow Wagyu chuck roast.
When choosing what to buy for a future roast, start with the cooking method and the number of diners. Then review the cut details rather than assuming every premium beef cut cooks alike. The Wagyu roasts collection is a relevant place to browse roast options, while the beef cuts and cooking methods guide can help you compare cuts before committing to a long braise.
Season the roast, let it sit briefly, then brown it on all sides. Set it in a covered braise with aromatics and stock, and cook at 150 C until the meat is tender. A practical starting point is four to six hours, with basting and rotation during the cook. This braised shin recipe uses the same general approach.
Plan on several hours rather than a fixed clock time. One published braising method uses four to six hours at 150 C, but the roast's size, bone, vessel, and starting temperature all affect the result. Start checking texture toward the early end of that range and continue until a fork or probe meets little resistance.
Yes. Brown the roast first, then transfer it to the slow cooker with enough braising liquid to create a moist cooking environment. Keep the lid closed and judge doneness by tenderness, not by a rigid timer. Beef shank is also commonly adapted for crock-pot cooking, but the exact timing depends on the appliance and roast.
Thor's Hammer is a frenched beef shank from the lower leg, usually left attached to a long bone. Frenching means trimming meat and fat back from the bone, which creates the distinctive hammer-like presentation. Because the shank contains substantial connective tissue, low, slow, moist cooking is the right lane.
Use texture as the deciding cue. A skewer, fork, or temperature probe should slide into the meat with little resistance, and the meat should yield cleanly when tested. Rest the finished roast under foil for at least 15 minutes before carving so the juices settle and the roast is easier to handle.
A dramatic roast starts with the right cut and a cooking plan that gives it time to become tender. When you are ready to choose beef for a future low-and-slow meal, shop the Wagyu collection for premium cuts that suit the occasion. Review the options, choose the cut that fits your table, and save this guide for the day you are ready to cook.
Your cart is currently empty.
Start Shopping